이전 포스트에서 간단하게 확장 파일을 저장해서 테스트 해보는 것 까지 작성 해보았다.
http://gogorchg.tistory.com/entry/Android-Expansion-file-%EC%9D%B4%EC%9A%A9%ED%95%98%EA%B8%B0-1
이번 포스트에선 직접 google play console에 APK와 확장 파일을 올려보고
앱을 설치하여 결과를 확인 하는 것 까지 해보겠다.
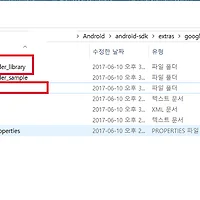
우선 확장 파일 다운로드를 위한 Service와 Receiver를 Sample에서 가지고 오겠습니다.
android-sdk/extras/google/market_apk_expansion/downloader_sample/src/com/example/expansion/downloader 에 있는
SampleAlarmReceiver.java 와 SampleDownloaderService.java 두 파일을 복사 해서 프로젝트에 붙여 넣습니다.

그런 후, 아래 형태로 소스를 만드세요.
## AndroidManifest.xml
<?xml version="1.0" encoding="utf-8"?>
<manifest xmlns:android="http://schemas.android.com/apk/res/android"
    package="com.gorchg.expansiontest">
    <uses-permission android:name="com.android.vending.CHECK_LICENSE" />
    <uses-permission android:name="android.permission.INTERNET" />
    <uses-permission android:name="android.permission.WAKE_LOCK" />
    <uses-permission android:name="android.permission.ACCESS_NETWORK_STATE" />
    <uses-permission android:name="android.permission.ACCESS_WIFI_STATE" />
    <uses-permission android:name="android.permission.WRITE_EXTERNAL_STORAGE" />
    <uses-permission android:name="android.permission.READ_EXTERNAL_STORAGE" />
    <uses-permission android:name="com.android.vending.BILLING" />

    <application
        android:allowBackup="true"
        android:icon="@mipmap/ic_launcher"
        android:label="@string/app_name"
        android:roundIcon="@mipmap/ic_launcher_round"
        android:supportsRtl="true"
        android:theme="@style/AppTheme">
        <activity android:name=".MainActivity">
            <intent-filter>
                <action android:name="android.intent.action.MAIN" />

                <category android:name="android.intent.category.LAUNCHER" />
            </intent-filter>
        </activity>

        <service
            android:name=".SampleDownloaderService"
            android:label="@string/app_name" />

        <receiver
            android:name=".SampleAlarmReceiver"
            android:label="@string/app_name" />
    </application>

</manifest>
## MainActivity.java
package com.gorchg.expansiontest;

import android.app.PendingIntent;
import android.content.Intent;
import android.content.pm.PackageInfo;
import android.content.pm.PackageManager;
import android.graphics.drawable.Drawable;
import android.os.Environment;
import android.support.v7.app.AppCompatActivity;
import android.os.Bundle;
import android.util.Log;
import android.widget.ImageView;

import com.android.vending.expansion.zipfile.ZipResourceFile;
import com.google.android.vending.expansion.downloader.DownloaderClientMarshaller;
import com.google.android.vending.expansion.downloader.Helpers;

import java.io.File;
import java.io.IOException;
import java.io.InputStream;

public class MainActivity extends AppCompatActivity {
    private static final String TAG = "MainActivity";
    private ImageView mImageView;

    @Override
    protected void onCreate(Bundle savedInstanceState) {
        super.onCreate(savedInstanceState);
        setContentView(R.layout.activity_main);

        mImageView = findViewById(R.id.img);

        checkExpansionFiles();
    }

    private void checkExpansionFiles() {
        PackageManager pkmanager = this.getPackageManager();
        PackageInfo info;

        try{
            info = pkmanager.getPackageInfo(this.getPackageName(), 0);
        }catch(PackageManager.NameNotFoundException e){
            e.printStackTrace();
            return;
        }

        String mainFileName = Helpers.getExpansionAPKFileName(this, true, info.versionCode);
        boolean fileExists = Helpers.doesFileExist(this, mainFileName, 8123865, false);
        Log.d("Expansion FIles", "fileExists : "+fileExists);
        if (fileExists) {
            getAssetFileDescriptor();
        } else {
            Intent launcher = getIntent();
            Intent fromNotification = new Intent(this, getClass());
            fromNotification.setFlags(Intent.FLAG_ACTIVITY_NEW_TASK | Intent.FLAG_ACTIVITY_CLEAR_TOP);
            fromNotification.setAction(launcher.getAction());

            if (launcher.getCategories() != null) {
                for (String cat : launcher.getCategories()) {
                    fromNotification.addCategory(cat);
                }
            }

            PendingIntent pendingIntent = PendingIntent.getActivity(
                    this, 0, fromNotification, PendingIntent.FLAG_UPDATE_CURRENT);

            try {
                // Start the download
                int result = DownloaderClientMarshaller.startDownloadServiceIfRequired(
                        this, pendingIntent, SampleDownloaderService.class);
                if (DownloaderClientMarshaller.NO_DOWNLOAD_REQUIRED != result) {
                    // implement Downloading UI.
                    getAssetFileDescriptor();
                    return;
                }
            } catch (PackageManager.NameNotFoundException e) {
                Log.e("apk-expansion-files", "NameNotFoundException occurred. " + e.getMessage(), e);
            }
        }
    }

    public void getAssetFileDescriptor(){

        PackageManager pkmanager = this.getPackageManager();
        PackageInfo info;

        try{
            info = pkmanager.getPackageInfo(this.getPackageName(), 0);
        }catch(PackageManager.NameNotFoundException e){
            e.printStackTrace();
            return;
        }
        String thePackageName = this.getPackageName();
        int thePackageVer = info.versionCode;
        File root = Environment.getExternalStorageDirectory();


        String zipFilePath = root.toString() + "/Android/obb/"+thePackageName+"/main."+
                thePackageVer+"."+thePackageName+".obb";

        try{
            ZipResourceFile expansionFile = new ZipResourceFile(zipFilePath);
            InputStream is = expansionFile.getInputStream("picture_1.JPG");
            this.mImageView.setImageDrawable(Drawable.createFromStream(is, null));

        }catch(IOException e){
            e.printStackTrace();
        }
    }
}
## SampleDownloaderService.java 에 Public Key 추가

위에 넣을 Public Key는 Google play console로 들어 간 후, '서비스 및 API'를 선택 한다.

그럼 아래와 같의 라이센스 키가 있는데 이 키를 복사 한 후, 위 소스에 붙여 넣습니다.

자!! 이제 소스를 완성 하였으니~
apk를 생성 하여 google play console에 등록 시킵니다.
그럼 아래와 같이 추가가 되면서, 우측에 + 버튼이 생깁니다.
이걸 눌러 주세요.

그 다음 확장 파일로 저장할 압축 파일을 선택 하고 저장 합니다.

그럼 아래와 같이 자동적으로 obb 파일로 변경 하여 생성이 됩니다.
확인 하신 후, 저장 버튼을 누릅니다.

이제 느낌표 떠 있는 모든 정보를 입력 하고 앱 등록 할 수 있도록 만듭니다.

테스트를 위해선 알파 비공개 테스트로 하는게 낫겠죠.

전 위와 같이 알파 테스트로 해서 테스트를 시작 합니다.
그럼 게시 보류중이라고 나옵니다.
앱이 등록이 될때까지 기다리세요~ ㅎ
적어도 30분안에는 되는 것 같더라구요.
앱 등록이 완료 되어, 설치를 하게 되면 문제 없이 이미지가 출력이 되는 것을 확인 할 수 있습니다.
참고로 알파테스트 할때 테스트 참여 URL은 아래와 같다.
https://play.google.com/apps/testing/앱 패키지명
ex> https://play.google.com/apps/testing/com.gorchg.expansiontest

참고하세요.
소스
 ExpansionTest.zip
'나의 플랫폼 > 안드로이드' 카테고리의 다른 글
| [Android] Java로 새로운 프로젝트를 만드는 것 이제 그만.... (번역) (0) | 2018.02.12 |
|---|---|
| [Android] 확장 파일에 temp가?? (0) | 2018.01.19 |
| [Android] Expansion file 이용하기 - 1 (3) | 2017.12.17 |
| [Android] 기본 카메라 앱 실행 시키기 (14) | 2017.11.23 |
| [Android] finishAffinity (0) | 2017.10.31 |